Thursday 5 July 2012

Costing sheet...


Costing sheet

To complete this project I spent a total of
£72.39 to purchase everything from my main fabrics, to the finishing touches. This worked out to be my most expensive project, however for this brief I was required to produce two garments instead of just one. As a rule I would normally spend around £30/£40 on materials for my previous projects and so in essence this could work out to be £35 pair garment. It didn’t actually work out to be an equal divide, as one of my garments was required to be more elaborate and detailed than the other, instantly making it more expensive. I took all these points into account and considered them when budgeting for my materials. Whilst I was purchasing my fabrics I tried to save money if and when it was possible, for example the leather look material I originally wanted was much more expensive than I had thought, and so I opted for a thinner alternative decreasing the price. I also looked in the clearance sections for cheaper priced materials; this is where I sourced the charcoal material I used as part of the roundhead garment, and the light blue fabric I used for the cavalier garment. Once I had completed my garments I realised I did have fabric left over, and so I could have saved a little bit of money on each of my fabrics by buying a fraction less of them. However I am glad I had spent that little bit more on my materials and had a little bit extra, as it allowed me room for mistakes if I was to make any.
Here is a breakdown of each individual cost;

Cavalier
Cream fabric:
£5.86
Light blue fabric:
£4.99
Navy blue fabric:
£8.74
Grey fabric:
£6.86
Bronze fabric:
£9.46
Gold buttons:
£2.50
Thin elastic: 
£0.40
Lace trimmings:
£1.10
Lace netting:
Recycled
Ribbon:
£0.30
Large feathers:
£4.40
Starch:
£1.20

Roundhead
Cream fabric:
£4.89
Leather fabric:
£15.49
Charcoal fabric:
£5.18
Tassels:
£1.20

Final garment

Cavalier


Sequence of construction

Collar
Step 1: I sourced old laced netting and decided to recycle the lace finishing. 
Step 2: Using fabric scissors I carefully cut along the seam connecting the lace to the rest of the
           netting.
Step 3: I folder the black ribbon in half and placed it at the centre top of the lace, and pinned it into 
           place.
Step 4: I then began to pin into place small side pleats, starting from the centre facing the outside 
           end of the lace. I repeated this for both sides.
Step 5: I finished of the ends of lace by folding over the raw edges and using a basic straight stitch 
           to keep in place.
Step 6: Using a sewing machine I began to machine stitch the pleats into place removing the pins as
           I approached them. 

Corset
Step 1: Using a pattern block I traced the outline of the pattern onto dot and cross paper; ensuring
           they was perfectly lined up. The seam allowance was already included on the pattern block 
           and so I didn’t need to add it on.
Step 2: I then cut out the pattern on the dot and cross paper and pinned it to my chosen fabric.
Step 3: Using fabric scissors I cut around the pattern before unpinning it from my fabric.
Step 4: I placed the panels into the correct order before placing them right sides together and
           pinning along the seam line.
Step 5: I set up a sewing machine and carefully began to sew the panels together, removing the pins 
           as I went along. 
Step 6: Once the corset was sewn into place I opened all the seams on the inside. I then changed 
           the settings on the sewing machine to the zigzag stitch and began to sew over the seams. I 
           chose to do this for three reasons; it created a feature out of the seams, it re-enforcing the
           seams making them stronger, and it created a tidy finish to the inside of the corset.
Step 7: I finished the edges off by folding over the raw edges and sewing it in place using a basic 
           straight stitch. I repeated this for both the top and the bottom. 
Step 8: Using a needle and thread I had stitched on looped piece of elastic on back of the corset 
           along the left hand side. I then stitched on gold buttons along the right hand side to create a 
           fastening for my corset. 
Step 9: I decided not to use boning for my corset as I wanted it to still remain fairly flexible and so I
          opted for starch. I sprayed a thin layer of starch over the whole of my corset before ironing 
          it to make the fabric stiffer. 
Step 10: I finished off my corset by sewing trimming onto selected seams to create both a feature 
            of them and produce strong visible lines giving the illusion of structure. 

Skirt
Step 1: I drew up an improvised pattern onto dot and cross paper, before pinning it onto my fabric.
Step 2: I cut around the pattern before removing the pins. I repeated both these steps for each of 
           my fabrics.
Step 3: I then placed my fabrics in the order I wanted, and began to place them right side facing, 
           before pinning them together along the seam. 
Step 4: After I had completed this, I machine stitched the fabrics together, removing the pins as I 
           went along. I left the two centre back panels open.
Step 5: I put a hem on the skirt by folding over the raw edges and sewing them into place.
Step 6: Once I had created the skirt I began to pin into place side pleats that would hide the seam 
           between the panels. I started them from the centre at the front, facing the centre at the 
           back, ensuring that each one was equal and would fit within the waist measurements. 
Step 7: I then machine stitched the pleats into place, removing each pin as I approached it. 
Step 8: I then sprayed the fabrics generously with liquid starch to toughen the fabrics, allowing the
           pleats to appear sharp, before ironing them in.
Step 9: For the front half of the skirt I decided to use the zigzag setting on the sewing machine to 
           machine stitch part way down each of the pleats. I did this for 2 reasons; it created a feature 
           of the pleats, and it helped to hold the pleats in place as I had used a mixture of fabrics, 
           some heavier than others.
Step 10: I then created a waistband by measuring a strip of my selected fabric and folding it in half, 
            wrong sides together.
Step 11: I then lay the skirt flat onto the waistband ensuring they lined up perfectly, before folding 
            the raw edges of the waistband into the inside of itself, pinning it into place as I went.
Step 12: Once I had done this, I then machine stitched a straight line a couple of mm’s up from the 
             bottom of the waistband.
Step 13: I then stitched together the two back panels of the skirt creating a full skirt. 
Step 14: I ironed open the seam and began to pin into place a zip, face down on the centre of the 
             seam. 
Step 15: I then hand tacked the zip into place, to ensure it would stay in place as I machine stitched 
             it.
Step 16: I then changed the foot on the sewing machine to the number 4 foot, and began to 
             machine stitch along the sides of the zip, staying as close to the zip as possible.
Step 17: Once I had completed this is used an unpicker to unpick both my hand tacked stitches, 
             and the seam along the zip face from the outside of the skirt.
Step 18: To finish off the skirt I decided to add on a thick trimming along the inside of the 
             waistband, allowing the top of it to my visible from the outside. I machine stitched this 
             into place using a straight stitch.


Pattern annotations...

Pattern annotations

Collar:
The collar didn’t require a pattern piece in order to make it. I simple just had to cut a piece of lace to the appropriate length.

Corset:
For the corset I used a simple pattern block. The pattern I used was a size 12. I chose this size as I was unsure of who was going to be my model at this point. I left the back panels of the corset unfinished until I had a model and size confirmed. Once I had a model I realised she was a size 8 and so I altered the corset accordingly. To do this I simply had to half each of the back panels in order to make it the correct size. My first thought was to trim down each of the panels leaving just enough fabric to be able to fold over and conceal the raw edges. However I opted against this, and instead decided to just fold it over in its original size. I did this because the fastening of my corset was going to be buttons with elastic loops, and so the extra fabric on that area would help to re-enforce it, making it stronger and more durable.

Skirt:
I improvised the pattern for the skirt as I wanted each pleat to be a different fabric. I was unsure of how to go about it at first and so I tested it out on paper first, cutting out panels before testing them and altering them where needed. I started by folding paper into side pleats, and colouring in where each fabric would go using a different colour. From there I cut out panels on a separate piece of paper that were the same shape as the original, and stapled them into place where the seam would be. After looking at it I decided it was too straight for the shape of the skirt I wanted to produce, I wanted more volume at the bottom of the skirt. I then began to angle the lines in for each of the panels, creating triangular shapes with the tip cut off at the top. Once I had the panels I began experimenting with the folds for the pleats, trying to determine where I would need to pleat the fabric in order for it to both hide the seam, and show an appropriate amount of the next fabric. On my first attempt I folded the panels in half and stapled them into place, I immediately realised the fault, as this resulted in the pleat of one fabric completely covering the next fabric. From here I decided to move the fold the panels a quarter of the way in, with the smallest portion being folded behind. I then stapled them together so that I could see how it would sit. I was much happier with the result, and so I scaled it up onto dot and cross paper before using it as a pattern piece for my final design. 

Detailing...


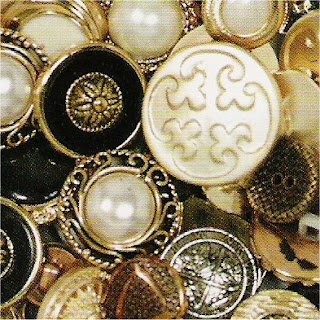
 Gold buttons for fastening on the corset.


Lace detailing for seams on the corset. 


Rough ideas


Corsets...


17th Century Stays/Corsets

In the 17th century clothes were softer and more flowing.
The heavy iron corset which flattened rather than shaped, gave way to corsetry that emphasised the waist and full skirts.

After 1630-40 the corset became part of the top fabric bodice as it was mounted on a boned lining. This was actually thought of as tailoring as the stays became one with the bodice gown.

Stays only returned in the 1670s when the patterned bodice was worn under the over gown. Then the boned section was once more thought of as stays and considered an undergarment.

The most famous fashion designer for corsets is none other than Jean Paul Gaultier, whose signature has become corsets. Gaultier reintroduced corset as outerwear in 1983 when he designed his first corset dress.


Other fashion designers who have adopted the corset as outerwear include:


Alexander McQueen


Givenchy Haute Couture


Jasmine di Milo

Thierry Mugler and Dolce & Gabanna


Vivienne Westwood


Vivienne Westwood

Ziad Ghanem


Dita Von Teese is iconically known for wearing corsets, some of which are actually deigned by Gauliter:


Taylor swift is almost always seen sporting a corset dress:


Monday 2 July 2012

Catholics, protestant and puritans...

Protestant is a general term for Christian groups that ''protested'' the Roman Catholic Church in the 16th and 17th century. It began with the ''reformation'' of Martin Luther in 1517 when he posted his ''95 theses'' on the church door.

'Puritan' refers to English Christians who believed that the ''English Reformation'' begun when King Henry VIII separated from the Catholic church to form the Anglican church (church of England)
They believed its church teachings and rituals needed further changes. They believed they should 'purify' it from within.